
Debugging a Dockerized Django app with VSCode
I am a huge advocate for integrating Docker into your development process.
There are many benefits to this, such as:
- Consistent developer environments
- Parity of development and production environments
- Dependency isolation from your laptop and development environment
However, all these benefits don’t come without a downside…
When you isolate your development server into a Docker container, your IDE no longer has direct access to the Python runtime on your machine.
This can limit the features your IDE offers and make it difficult to do things such as set breakpoints to debug your code.
However, there is a solution.
VSCode integrates very nicely with Docker and Django, giving you the best of both worlds.
In this guide, I’ll show you how to use VSCode to setup a new Django project that you can run and debug using Docker.
In this guide I’ll show you how to setup a Django project with VSCode and configure it to work with the debugger.
You can find the completed source code for the project we create here: github.com/LondonAppDeveloper/vscode-django-docker
Prerequisites
Before you get started, ensure you have the following:
- Docker Desktop (or docker and docker-compose if you’re using Linux)
- Visual Studio Code
- The Docker and Python VSCode extensions
Creating a Django project
Start by creating a new directory for your project (eg: vscode-django-docker), and open it in VSCode.
Then, add a .gitignore for Python (I use the Python.gitignore template provided by GitHub) and a README.md file.

Create a new directory called app/ in the root of your project (this is where we’ll store our Django app).

Now we’ll create our Django project by running the command below in the Terminal (macOS/Linux) or PowerShell on Windows:
docker run -v ${PWD}/app:/app -w /app python:3.9-alpine sh -c "pip install Django==3.2 && django-admin startproject app ."I’ll break this command down and explain what each part does below:
docker runis the command for running a docker container.-v ${PWD}/app:/appmaps a volume from the app/ directory in our project to the /app directory in the Docker container. We need this so that our Django project files end up on our local filesystem when we run thestartprojectcommand. The${PWD}part is a command that prints the working directory, because thedocker runcommand requires a full path to the directory.-w /apptells the docker container to work from the /app directory which we mapped in the step above.python:3.9-alpineis the Docker image we are using (it’s available on the Docker Hub).sh -cis the start of the command which we will run inside our Docker image. Whatever we pass in after this bit will be executed as a shell command.pip install Django==3.2will install Django version 3.2 inside the Docker container when it starts.&&is for running multiple shell commands on one line.django-admin startproject app .is the Django CLI command for starting a new project. We’re calling the project app, and providing the.character so the project is created in our current directory (otherwise it will add a new subdirectory at app/app/).
When you run this, Docker will download the python:3.9-alpine image (if it’s not cached) and run the commands for installing Django and creating a project.

Once done, you should see the project files appear inside app/:

Creating Docker configs with VSCode
VSCode comes with a very useful tool for auto generating Docker templates for Django.
Before you continue, note that this process will create the following files in your project, replacing them if they already exist:
- requirements.txt
- Dockerfile
- docker-compose.yml
- docker-compose.debug.yaml
- .vscode/launch.json
- .vscode/tasks.json
If you’re following these steps for a project that already has these files, I recommend the process below:
- Re-name of move your existing files out of your project (for example, you might rename requirements.txt to requirements.txt.backup).
- Run the steps defined below.
- Manually update each auto-generated file with the necessary changes from your previous version.
- Remove the .backup files.
To use it, you’ll need to access the command pallet using the following shortcut:
- macOS: CMD + SHIFT + P
- Windows: CTRL + SHIFT + P
Start typing “add docker” and then choose Docker: Add Docker Files to Workspace.

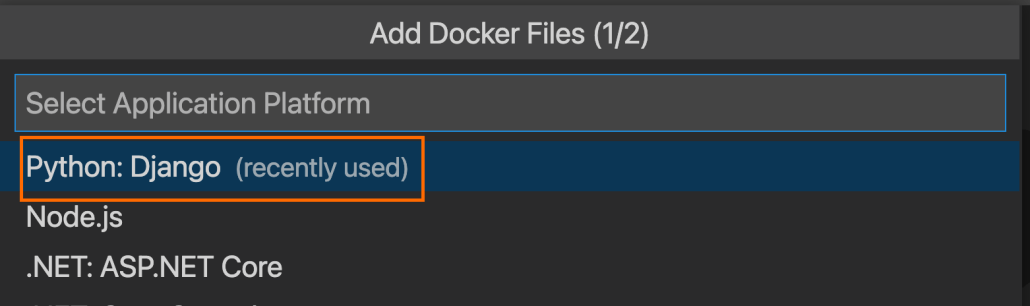
On the Select Application Platform prompt, locate Python: Django and select it:
On the Choose the app’s entry point prompt, select app/manage.py and select it:

You should be asked which port your app will listen on. Leave it as 8000 and hit enter:

In the Include optional Docker Compose files? prompt, select Yes:

The following files (displayed in green) should be added to your project:

Modify VSCode Template Files
The template files generated by VSCode are a great start, however in most cases you will need to modify it for your bespoke project.
Note to macOS and Linux users
Because the VSCode devs probably generated these templates using Windows, you’ll need to modify the line endings from CLRF to LF. This needs to be done per file.
To do this, open the file, and select CLRF (bottom right) and choose LF:

Next we’ll go through each file and make the appropriate changes.
requirements.txt
Update the requirements.txt file to look like this:
django>=3.2,<3.3
gunicorn>=20.0.4,<20.1
This will do two things:
- Update Django to use 3.2 instead of 3.1 which was auto generated at the time of writing this
- Use >= and < syntax to ensure patch versions are auto updated when building the containers
Dockerfile
Next we need to update the Dockerfile.
Where possible, I suggest using alpine based images because they are more lightweight, so I’ll be doing that also.
Update your Dockerfile to read the following:
# For more information, please refer to https://aka.ms/vscode-docker-python
FROM python:3.9-alpine3.13

EXPOSE 8000

# Keeps Python from generating .pyc files in the container
ENV PYTHONDONTWRITEBYTECODE=1

# Turns off buffering for easier container logging
ENV PYTHONUNBUFFERED=1

# Install pip requirements
COPY requirements.txt .
RUN python -m pip install -r requirements.txt

WORKDIR /app
COPY /app /app

# Creates a non-root user with an explicit UID and adds permission to access the /app folder
# For more info, please refer to https://aka.ms/vscode-docker-python-configure-containers
RUN adduser -u 5678 --disabled-password --gecos "" appuser && chown -R appuser /app
USER appuser

# During debugging, this entry point will be overridden. For more information, please refer to https://aka.ms/vscode-docker-python-debug
# File wsgi.py was not found in subfolder: 'vscode-django-docker'. Please enter the Python path to wsgi file.
CMD ["gunicorn", "--bind", "0.0.0.0:8000", "app.wsgi"]
Here is a summary of the changes:
- Changed base image to python:3.9-alpine3.13 because it is more lightweight.
- Changed the
COPY . /appcommand toCOPY /app /appso only our Django app is copied into the Docker image. - Modified the
gunicorncommand to use theapp.wsgifile for running our app.
Once these changes are made, you can test them by running the following in the Terminal or Command Prompt window:
docker-compose build
docker-compose up
This will build and run the Docker container using Docker Compose.
Once complete, you should be able to view your Django app by visiting http://127.0.0.1:8000 in your favourite browser:

docker-compose.debug.yml
Open up docker-compose.debug.yml.
Locate the app/manage.py line and remove the app/ to change it to manage.py.
Once done, the full line should look like this:
command: ["sh", "-c", "pip install debugpy -t /tmp && python /tmp/debugpy --wait-for-client --listen 0.0.0.0:5678 manage.py runserver 0.0.0.0:8000 --nothreading --noreload"]The full docker-compose.debug.yml file should look like this:
version: '3.4'

services:
  vscodedjangodocker:
    image: vscodedjangodocker
    build:
      context: .
      dockerfile: ./Dockerfile
    command: ["sh", "-c", "pip install debugpy -t /tmp && python /tmp/debugpy --wait-for-client --listen 0.0.0.0:5678 manage.py runserver 0.0.0.0:8000 --nothreading --noreload"]
    ports:
      - 8000:8000
- 5678:5678We make this change because our container is already working from the app/ directory, so we can call the manage.py file directly.
.vscode/launch.json
Next open up .vscode/launch.json, locate the line "localRoot": "${workspaceFolder}", and replace it with "localRoot": "${workspaceFolder}/app",.
The full file should look like this:
{
    "configurations": [
        {
            "name": "Docker: Python - Django",
            "type": "docker",
            "request": "launch",
            "preLaunchTask": "docker-run: debug",
            "python": {
                "pathMappings": [
                    {
                        "localRoot": "${workspaceFolder}/app",
                        "remoteRoot": "/app"
                    }
                ],
                "projectType": "django"
            }
        }
    ]
}
Again, this change is because our Django project is going to be stored within /app instead of the root project.
.vscode/tasks.json
Open up .vscode/tasks.json and change "file": "app/manage.py" to "file": "manage.py".
The full file should look like this:
{
	"version": "2.0.0",
	"tasks": [
		{
			"type": "docker-build",
			"label": "docker-build",
			"platform": "python",
			"dockerBuild": {
				"tag": "vscodedjangodocker:latest",
				"dockerfile": "${workspaceFolder}/Dockerfile",
				"context": "${workspaceFolder}",
				"pull": true
			}
		},
		{
			"type": "docker-run",
			"label": "docker-run: debug",
			"dependsOn": [
				"docker-build"
			],
			"python": {
				"args": [
					"runserver",
					"0.0.0.0:8000",
					"--nothreading",
					"--noreload"
				],
				"file": "manage.py"
			}
		}
	]
}Creating a Django View
Now we have updated the files, we’ll create a new Django view that we can use for debugging.
Create a new file at app/app/views.py and fill it with the following contents:
from django.http import HttpResponse


def index(request):
    return HttpResponse('Hello World!')
Then modify app/app/urls.py to read the following:
from django.contrib import admin
from django.urls import path

from app.views import index

urlpatterns = [
    path('admin/', admin.site.urls),
    path('', index),
]Using the Debugger
Finally, let’s test our debugger.
Open up app/app/views.py and add a breakpoint on the return line by clicking the area left of the line number:

Now start the debugger by selecting Run > Start Debugging:

The debugger should kick in.
You can select the bug icon on the left to inspect variables:

You can inspect variables from the debugger menu on the left:

Use the debugger menu on the top to navigate through the code:

That’s how to use the VSCode interactive debugger with a Django application.
You can find the final source code here: github.com/LondonAppDeveloper/vscode-django-docker
Thank you for reading.
If you have any feedback or comments, or if you prefer to use VSCode a different way, then please leave a comment below.


If my application name is my_app and my root folder is src then what changes do i need to make? I tried replacing app to src everywhere but because you project name is app as well, it creates a lot of confusion. Basically i am trying to debug an existing project
How do you add postgres to this when debugging and other services and how would you add a generalized docker-compose for people to run on server?
This is not works when you have your postgress database running in another containers, even when you are using the same bridge network.
I do something simple, just modifying the manager.py file in order to listen the debugpy there and open the port which debugpy will use.
I had a timeout issue when trying to debug on a linux OS. Temporarily disabling ufw firewall solved this as a quick fix, then I added a ufw firewall rule for this. Thanks for this blog 🙂
Hi, what happend with the python interpreter? how can I configure for working on docker?
Thx
Great article!!
Some issue happened in excuting “docker run -v ${PWD}/app:/app -w /app python:3.9-alpine sh -c “pip install Django==3.2 && django-admin startproject app .” ” on windows.
I replace “${PWD}” with “%cd%” and solve the issue
Great article!!
Some issue happened in excuting “docker run -v ${PWD}/app:/app -w /app python:3.9-alpine sh -c “pip install Django==3.2 && django-admin startproject app .” ” on windows.
I replace “${PWD}” with “%cd%” and solve the issue